First Start
The following three steps will guide you through the basic commissioning process to get a freshly unboxed LXA TAC into a usable state.
Connect to Network and Power Supply
To power the LXA TAC and provide network connectivity at the same time you can connect the LXA TAC’s uplink-port to a network outlet that provides Power over Ethernet (PoE). Alternatively you can connect the uplink-port to a normal (non-PoE) network port and use a 12V 1.5A power supply to power the LXA TAC.
Note
Any 802.3 af or 48V PoE-injector or 12V DC-Supply with a center-positive barrel jack and an amperage rating of 1.5A or more should work.
After connecting the power supply you should see some signs of life from the LXA TAC, like blinking LEDs and the LCD showing a boot splash.
Setup Wizard
To perform administrative tasks and to use some of the labgrid resources exposed by the TAC you will need SSH access to the device. The TAC is configured to only allow SSH public key based authentication and to disallow password based authentication.
To get access to the TAC you will thus have to deploy at least one public key to the device. This can be done via the web-based setup wizard. On first setup the LXA TAC displays a help text on its display that contains an URL you can use to connect to the web interface.
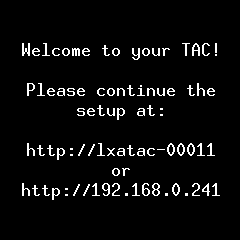
The content of the local display guiding you to the setup wizard.
The setup wizard will ask you to provide a SSH public key you want to use to access the device. After adding your key and saving the file you should try accessing the device via SSH (as described below) to make sure the keys work.
The wizard will also ask you to configure the labgrid exporter running on the device to match your labgrid deployment. If you are not sure what to enter you can skip these steps for now.
You can get back to the setup wizard at any point in time by selecting the Setup Mode option on the System Status page of the local user interface of the TAC.
Check for updates
The setup wizard will ask if you want to periodically check for software updates. Choosing yes will result in a message being shown on the web interface and the LCD on the device whenever an update is available. To do that the TAC periodically connects to our update server via https to check for a new software version. During this connection the following information will be transmitted:
The IP address the connection is coming from.
Information on currently installed software.
The serial number of your device.

The content of the local display informing you about an update.
We suggest enabling update polling so you can always stay up to date. You may still choose to skip or delay the updates.
SSH Access
Once you have completed the setup wizard you should be able to access the
TAC via ssh.
To test this run:
$ ssh root@[hostname or IP address]
on your PC. Replace [hostname or IP address] with the hostname or
IP address you used to access the web interface.
You should be welcomed by a root shell on the device that you can use to have
a look around the system.
If you have issues getting initial access to the TAC you may want to try using the Serial Debug Console for troubleshooting.